A NAS with an Intel or AMD x86 CPU running Docker is the most reliable way to host Home Assistant in an Australian home, and it consolidates your smart home controller, file server, and backup system into a single always-on device that draws 15-35 watts. Running Home Assistant on a dedicated Raspberry Pi works, but a NAS gives you proper storage redundancy, scheduled backups, and the processing headroom to run additional containers alongside it. Things like MQTT brokers, Node-RED, Zigbee2MQTT, and media servers. If you already own a NAS with an x86 CPU or are considering buying one, Home Assistant is one of the best reasons to put that hardware to work. This guide covers everything Australian buyers need to know: which NAS models to choose, how to install Home Assistant via Docker or a VM, how to pass through Zigbee and Z-Wave USB sticks, and how to solve the CGNAT remote access problem that affects most NBN connections.
In short: Install Home Assistant Container (Docker) on any NAS with an x86 CPU and at least 2 GB of RAM. The Synology DS225+ ($549-$599), QNAP TS-264 ($819-$949), and Asustor AS5402T ($639-$789) all handle it comfortably. Use Home Assistant Supervised in a VM if you need the full add-on store. For Zigbee devices, plug a Sonoff ZBDongle-P or similar coordinator into the NAS USB port and pass it through to the container. CGNAT on most NBN connections blocks inbound access. Use Tailscale, Cloudflare Tunnel, or Nabu Casa for remote control.
Why Run Home Assistant on a NAS Instead of a Raspberry Pi
The Raspberry Pi has been the default Home Assistant platform for years, and it works fine for small setups. But a NAS solves three problems that Pi users constantly hit: storage reliability, processing power, and SD card corruption. A NAS runs on proper hard drives or SSDs with RAID redundancy, has a real CPU that won't choke when compiling automations or running machine learning integrations, and doesn't rely on a fragile SD card that fails without warning.
More importantly, a NAS is already designed to run 24/7. It has a proper power supply, thermal management, and. If you pair it with a UPS. Graceful shutdown during power outages. Your Home Assistant instance gets the same always-on reliability as your file shares, Plex server, or backup system. One box, one power draw, one set of maintenance tasks.
The trade-off is cost. A Raspberry Pi 4 costs roughly $100-$130 AUD. A capable NAS starts at around $550-$600 before drives. But if you already need a NAS for storage, running Home Assistant on it is essentially free. It uses minimal resources and doesn't require any additional hardware beyond a Zigbee or Z-Wave USB coordinator if you're using those protocols.
Minimum Hardware Requirements
Home Assistant Container (the Docker version) is not resource-hungry, but it does have firm requirements that rule out some NAS models entirely.
| CPU | x86_64 (Intel/AMD). ARM works but limits add-on compatibility |
|---|---|
| RAM (minimum) | 2 GB (4 GB+ strongly recommended) |
| RAM (comfortable) | 4-8 GB for HA + additional containers |
| Storage | 1-2 GB for HA container, plus database grows over time |
| Docker support | Required. Official package or Container Manager |
| USB ports | At least one free USB port for Zigbee/Z-Wave coordinator |
| Network | Gigabit Ethernet minimum, 2.5GbE preferred |
The CPU architecture matters most. Home Assistant runs on ARM-based NAS units (Realtek RTD1296/RTD1619B), but many community integrations and add-ons are compiled only for x86_64. If you plan to run Home Assistant with a full integration ecosystem, an Intel Celeron or AMD Ryzen-based NAS is the safest choice. The budget ARM models. Synology DS124 ($269 at Scorptec), QNAP TS-233 ($399 at Scorptec/PLE), Asustor Drivestor 2 Lite (~$399 at Scorptec/PLE). Can technically run it but will struggle with anything beyond a basic setup.
ARM NAS models are not recommended for Home Assistant. The Synology DS223 ($489), DS124 ($269-$289), QNAP TS-133 ($259-$299), and Asustor Drivestor series use ARM processors. While Docker runs on these, Home Assistant's ecosystem increasingly assumes x86_64. You will hit compatibility walls with integrations, HACS add-ons, and Zigbee2MQTT builds. Spend the extra money on an x86 model. It will save hours of troubleshooting.
Best NAS Models for Home Assistant in Australia
The ideal Home Assistant NAS has an x86 CPU, at least 4 GB of RAM, Docker support, and USB 3.0 ports for Zigbee/Z-Wave coordinators. Here are the models that tick every box, with current Australian pricing from the major retailers.
Best NAS Models for Home Assistant. AU Pricing (Feb 2026)
 Synology DS225+
|
 Synology DS425+
|
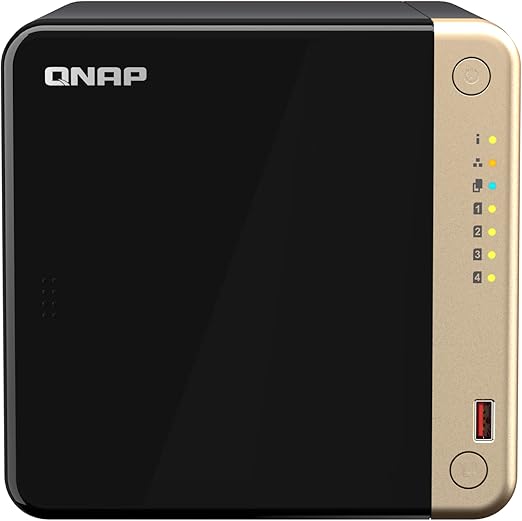
 QNAP TS-264
|
 QNAP TS-464
|
 Asustor AS5402T
|
 Asustor AS5404T
|
 TerraMaster F2-425
|
|
|---|---|---|---|---|---|---|---|
| CPU | Intel Celeron | Intel Celeron | Celeron N5095 | Celeron N5095 | Celeron N5105 | Celeron N5105 | Intel Celeron N5095 |
| RAM | 2 GB (expandable) | 2 GB (expandable) | 8 GB | 8 GB | 4 GB | 4 GB | 4 GB |
| Bays | 2 | 4 | 2 | 4 | 2 | 4 | 2 |
| Network | 2.5GbE + 1GbE | 2.5GbE + 1GbE | Dual 2.5GbE | Dual 2.5GbE | Dual 2.5GbE | Dual 2.5GbE | 2.5GbE |
| Docker | Yes (Container Manager) | Yes (Container Manager) | Yes (Container Station) | Yes (Container Station) | Yes (Portainer) | Yes (Portainer) | Yes |
| USB passthrough | Yes | Yes | Yes | Yes | Yes | Yes | Yes |
| AU Price (from) | $599 (PLE Computers) | $819 (Scorptec) | $819 (PLE) | $989 (Scorptec) | $789 (Mwave) | $879 (Mwave) | $459 (Scorptec) |
Prices last verified: 16 March 2026. Always check retailer before purchasing.
The Synology DS225+ ($549 at Scorptec, $585 at Mwave, $599 at PLE) suits most Australian smart home setups because Synology's Container Manager is the most polished Docker interface on any NAS, and the community documentation for running Home Assistant on Synology is extensive. The 2 GB base RAM is tight. Upgrade to at least 4 GB if running additional containers alongside HA. For more storage capacity and room to grow, the DS425+ ($819 at Scorptec, $899 at Mwave, $999 at PLE) provides four bays at a moderate price increase.
The QNAP TS-264 ($819 at PLE, $917-$949 at Mwave/Scorptec) ships with 8 GB of RAM, making it the best value for running Docker and virtualisation workloads without upgrades. QNAP's Container Station and Virtualisation Station both support Home Assistant installation. If you want four bays, the TS-464 ($999 at Scorptec, $1,099 at PLE) is the go-to choice and has enough headroom for Home Assistant plus a full container stack.
The Asustor AS5402T ($639 at Scorptec, $789 at Mwave) and AS5404T ($799 at Scorptec, $879 at Mwave) are strong alternatives, especially for buyers who want Portainer-based Docker management and a gaming-inspired design. Asustor's ADM supports Docker natively and USB passthrough works without extra configuration. See our best NAS for Docker and home automation guide for a deeper comparison.
The TerraMaster F2-425 ($459 at Scorptec) deserves a mention as the budget x86 option. It has an Intel Celeron N5095 and runs Docker, but TerraMaster's TOS software is less mature than Synology's DSM or QNAP's QTS, and community documentation for Home Assistant on TerraMaster is sparse. It works, but expect to spend more time troubleshooting.
Docker vs VM. Two Ways to Install Home Assistant
There are two practical ways to run Home Assistant on a NAS, and the right choice depends on whether you need the full add-on ecosystem or just the core platform.
Option 1: Home Assistant Container (Docker)
This is the simplest and most resource-efficient method. You run the official Home Assistant Container image inside Docker, which is available on Synology (Container Manager), QNAP (Container Station), and Asustor (Portainer/Docker CE). The container runs alongside your other NAS services without a hypervisor layer, so overhead is minimal.
Pros
- Lightweight. Uses 256-512 MB RAM in typical operation
- Simple setup via Docker Compose or the NAS GUI
- Starts in seconds, restarts automatically on NAS reboot
- Full access to NAS storage for backups and media
- Well-documented with extensive community guides for each NAS brand
Cons
- No built-in Add-on Store. You must run add-ons as separate containers
- No Supervisor. No automatic backup management or update notifications
- USB passthrough requires manual device mapping in Docker config
- Some HACS integrations assume Supervised or OS installation
Option 2: Home Assistant Supervised (VM)
For the full Home Assistant experience including the Add-on Store, automatic backups, and the Supervisor management layer, you need to run Home Assistant OS inside a virtual machine. Synology offers Virtual Machine Manager (VMM), QNAP offers Virtualisation Station, and both support the HAOS VM image. This gives you the same experience as running Home Assistant on dedicated hardware like Home Assistant Green or Yellow.
Pros
- Full Add-on Store access. One-click install of Zigbee2MQTT, Node-RED, ESPHome, and more
- Supervisor handles backups, updates, and system health monitoring
- Closer to the 'official' Home Assistant experience
- USB passthrough works at the hypervisor level. Often more reliable
Cons
- Heavier on resources. Allocate at least 2 GB RAM and 2 vCPUs to the VM
- Requires NAS models that support virtualisation (Synology Plus/XS series, QNAP x64 models)
- Slower startup. VM boot adds 30-60 seconds vs Docker container
- More complex initial setup and ongoing maintenance
Which method to choose: If you're comfortable with Docker and don't mind running add-ons as separate containers, the Docker method is simpler and uses fewer resources. If you want the full add-on ecosystem with one-click installs and built-in backup management, run the VM. Most experienced NAS users prefer Docker because it leaves more resources free for other NAS tasks.
Step-by-Step: Installing Home Assistant via Docker
This walkthrough covers the Docker method, which works on Synology, QNAP, and Asustor. The process varies slightly by NAS brand, but the core steps are the same.
Step 1. Enable Docker on Your NAS
Synology: Open Package Center, search for "Container Manager" (it replaced the old "Docker" package in DSM 7.2), and install it. QNAP: Open App Center, search for "Container Station", and install it. Asustor: Open App Central, install "Docker CE" and optionally "Portainer" for a web GUI. All three platforms pull Docker images from Docker Hub.
Step 2. Create a Configuration Directory
Create a shared folder or directory on your NAS to store the Home Assistant configuration. This keeps your configuration persistent across container restarts. On Synology, create a shared folder called homeassistant (or use an existing docker shared folder). On QNAP, create a folder under /share/Container/homeassistant. On Asustor, use /volume1/docker/homeassistant or similar.
Step 3. Deploy the Container via Docker Compose
The cleanest method is a Docker Compose file. SSH into your NAS (or use the Container Manager/Station GUI to create a new project) and use this configuration:
version: '3'
services:
  homeassistant:
    container_name: homeassistant
    image: ghcr.io/home-assistant/home-assistant:stable
    volumes:
      - /volume1/docker/homeassistant:/config
      - /etc/localtime:/etc/localtime:ro
    devices:
      - /dev/ttyUSB0:/dev/ttyUSB0  # Zigbee/Z-Wave USB stick
    restart: unless-stopped
    privileged: true
    network_mode: host
Adjust the volume path to match your NAS directory structure. The network_mode: host setting is important. It allows Home Assistant to discover devices on your local network via mDNS and SSDP, which is essential for finding Chromecast, Sonos, and other smart home devices. The devices line maps your Zigbee or Z-Wave USB coordinator into the container. If you don't use USB devices yet, you can omit that line and add it later.
Step 4. Access the Home Assistant Dashboard
Once the container is running, open a web browser and navigate to http://[your-nas-ip]:8123. The Home Assistant onboarding wizard will walk you through creating your admin account, setting your home location (which enables Australian time zone and weather data), and discovering devices on your network. The first boot takes 2-5 minutes as HA initialises its database and downloads core components.
Zigbee and Z-Wave USB Passthrough
If you're using Zigbee devices (Aqara sensors, IKEA TRADFRI, Hue bulbs without the bridge) or Z-Wave devices, you'll need a USB coordinator plugged into your NAS. The most popular options in Australia are the Sonoff ZBDongle-P (Zigbee, available on Amazon AU for around $40-50 AUD), the SONOFF ZBDongle-E, and the Aeotec Z-Stick 7 (Z-Wave, around $70-90 AUD).
USB passthrough maps the physical USB device on the NAS to the Home Assistant container or VM, so Home Assistant can communicate directly with the coordinator. Without it, HA cannot see the USB stick at all.
How to Pass Through USB on Each NAS Brand
Synology (Docker): SSH into the NAS and run ls /dev/ttyUSB* or ls /dev/ttyACM* to find your USB device. Add it to the Docker Compose file under devices: as shown above. On Synology DSM 7.2+, you can also map devices through the Container Manager GUI under the container's settings. Synology requires the container to run in privileged mode for USB access.
QNAP (Docker): Similar process. SSH in, identify the device path, and map it in Container Station. QNAP's Container Station GUI allows adding devices directly when creating or editing a container. USB pass-through also works in Virtualisation Station if running the VM method. Attach the USB device to the VM from the hypervisor settings.
Asustor (Docker): Asustor's Docker implementation supports USB passthrough via the --device flag in the Docker run command or the equivalent Compose setting. Portainer also lets you add devices through the GUI. Asustor generally has fewer restrictions on USB access than Synology, so passthrough tends to be more straightforward.
USB device names can change on reboot. If your NAS has multiple USB devices, the device path (e.g., /dev/ttyUSB0) might change between reboots. To prevent this, create a persistent device symlink using a udev rule, or use the device's serial number path under /dev/serial/by-id/ instead. This is the single most common cause of "Zigbee stopped working after reboot" posts on the Home Assistant forums.
Remote Access on Australian NBN. The CGNAT Problem
This is the section most Australian Home Assistant users need and most international guides skip entirely. Carrier-Grade NAT (CGNAT) is used by most Australian NBN retail service providers (RSPs) to share a single public IPv4 address among multiple customers. If you're on CGNAT, you cannot open ports on your router to reach Home Assistant from outside your home. Because you don't have a real public IP address in the first place.
How do you know if you're on CGNAT? Log into your NBN router and check your WAN IP address. If it starts with 100.64.x.x through 100.127.x.x, you're behind CGNAT. You can also compare your router's WAN IP with what whatismyip.com shows. If they differ, CGNAT is in play. Most RSPs on NBN HFC and Fixed Wireless connections use CGNAT by default. FTTP connections are more likely to have a real public IP, but it varies by provider.
For a full technical breakdown of remote access options for NAS on Australian connections, see our dedicated NAS remote access and VPN guide. Here are the three practical solutions for Home Assistant specifically:
Solution 1: Nabu Casa (Easiest)
Home Assistant's official cloud service, Nabu Casa (USD $6.50/month or $65/year), provides a secure tunnel that works regardless of CGNAT. It requires zero networking knowledge. Enable it in the Home Assistant UI, log in with your Nabu Casa account, and remote access works immediately. It also enables Google Assistant and Alexa voice integration. The subscription directly funds Home Assistant development, which is a reasonable justification for the ongoing cost. For most Australian users, this is the simplest and most reliable option.
Solution 2: Tailscale or WireGuard VPN (Most Secure)
Tailscale creates a peer-to-peer mesh VPN that punches through CGNAT using relay servers. Install the Tailscale client on your NAS (available as a Synology package, QNAP QPKG, or Docker container) and on your phone/laptop. All devices on your Tailscale network can reach each other directly without opening any ports. The free tier supports up to 100 devices, which is more than enough for home use. Alternatively, run a WireGuard VPN container on your NAS and connect through it. But this requires a public IP or a VPS relay, making it more complex on CGNAT connections.
Solution 3: Cloudflare Tunnel (Free, Technical)
Cloudflare Tunnel (formerly Argo Tunnel) routes traffic through Cloudflare's network to reach your Home Assistant instance without opening ports. It's free for personal use and works behind CGNAT. You'll need a domain name (around $15-$20 AUD/year for a .com.au) pointed at Cloudflare's nameservers, plus the cloudflared container running on your NAS. This method gives you a proper HTTPS URL (e.g., ha.yourdomain.com.au) and Cloudflare's DDoS protection. The setup is more involved than Nabu Casa but has no ongoing subscription cost beyond the domain registration.
Ask your RSP for a static IP. Some Australian NBN providers (Aussie Broadband, Superloop, Launtel) offer static IPv4 addresses for $5-$10/month. A static IP eliminates CGNAT entirely and lets you use standard port forwarding or a reverse proxy. If your RSP offers this, it's the cleanest solution and benefits all your self-hosted services, not just Home Assistant.
Power Consumption Considerations
A NAS running Home Assistant draws power 24/7, so electricity cost matters. Especially with Australian power prices averaging $0.30-$0.40/kWh depending on your state and retailer. The good news is that modern NAS units are surprisingly efficient.
A 2-bay NAS like the Synology DS225+ draws roughly 15-20 watts under typical Home Assistant load with two hard drives. That translates to approximately $40-$70 per year in electricity at Australian rates. A 4-bay model draws 25-35 watts, pushing the annual cost to $65-$110. Compare that to a Raspberry Pi 4 at 5-7 watts ($13-$25/year). The NAS costs more to run, but you're getting vastly more capability. For detailed measurements, see our NAS power consumption guide.
If power consumption is a primary concern, consider running your NAS drives in hibernate mode during off-peak hours. Home Assistant itself runs from RAM and SSD cache, so the hard drives only need to spin up for database writes (which can be scheduled) and file access. Some users install an M.2 NVMe SSD for the Home Assistant database and let the hard drives sleep most of the time.
Additional Containers to Run Alongside Home Assistant
One of the biggest advantages of running Home Assistant on a NAS via Docker is the ability to run complementary containers on the same hardware. These are the most common additions for Australian smart home setups:
Zigbee2MQTT. Bridges Zigbee devices to Home Assistant via MQTT without vendor-specific hubs. Supports hundreds of devices from Aqara, IKEA, Sonoff, Tuya, and others. Runs as a lightweight Docker container and requires a Zigbee USB coordinator.
Mosquitto (MQTT Broker). The message broker that Zigbee2MQTT and many other integrations communicate through. Essential if you're using any MQTT-based devices or services. Uses minimal resources.
Node-RED. A visual flow-based automation tool that integrates with Home Assistant. Many users prefer Node-RED's drag-and-drop interface for complex automations over Home Assistant's native YAML-based system. Runs comfortably alongside HA on any x86 NAS.
ESPHome. Lets you flash and manage custom firmware on ESP32/ESP8266 devices. Compiles firmware directly on the NAS, which requires an x86 CPU. ARM NAS models cannot compile ESPHome firmware locally. Another reason to avoid ARM-based NAS units for Home Assistant.
Tailscale or Cloudflared. As discussed above, running either as a container on the NAS solves the CGNAT remote access problem without any configuration on your router.
Backup and Recovery
Running Home Assistant on a NAS gives you proper backup infrastructure that a Raspberry Pi setup simply cannot match. Your Home Assistant configuration directory sits on a RAID-protected volume, and the NAS can snapshot or back it up to external storage, another NAS, or a cloud service automatically.
Recommended backup approach: Schedule a daily cron job or NAS task that copies the Home Assistant configuration directory to a separate shared folder. On Synology, use Hyper Backup to back up the docker/homeassistant folder to Backblaze B2 or an external USB drive. On QNAP, use Hybrid Backup Sync. Keep at least 7 days of snapshots. The entire Home Assistant configuration is typically 50-200 MB, so backup storage requirements are trivial.
If you're running the VM method with Home Assistant OS, the built-in Supervisor handles snapshots natively. You can schedule full snapshots from within the Home Assistant UI and store them on the NAS shared folder, which then gets backed up through your normal 3-2-1 backup strategy.
Common Issues and Troubleshooting
Container won't start after NAS update: NAS firmware updates (DSM, QTS, ADM) occasionally break Docker networking or change kernel modules. After a major NAS update, check that the Docker service is running and recreate the container if needed. Keep your Docker Compose file stored outside the container so you can redeploy quickly.
Zigbee devices stop responding: Almost always a USB device path change after reboot. Use /dev/serial/by-id/ paths instead of /dev/ttyUSB0. If using Zigbee2MQTT, update the serial port path in its configuration.yaml.
Home Assistant is slow to load: Check if your NAS is running low on RAM. Home Assistant's database (home-assistant_v2.db) grows over time and can become several gigabytes if you haven't configured recorder settings. Add purge_keep_days: 7 to your recorder configuration to limit database size. Also ensure you're not running the HA database on a hard drive. Move it to an M.2 SSD cache if your NAS supports it.
mDNS discovery not working: If Home Assistant can't find Chromecast, Sonos, or other network devices, confirm the container is running in network_mode: host. Bridge mode networking blocks multicast traffic, which breaks mDNS/SSDP discovery. On QNAP, also check that the "Network & Virtual Switch" settings aren't filtering multicast.
Australian Consumer Law and NAS Purchases
Australian Consumer Law (ACL) protections apply when purchasing a NAS from an Australian retailer. This is particularly relevant for NAS buyers because a NAS is an always-on device storing irreplaceable data. If the hardware fails within a reasonable time, you have strong rights to a repair, replacement, or refund. Buying from Australian specialist retailers like Scorptec, PLE, or Mwave ensures full ACL coverage. Grey imports from overseas marketplaces are cheaper but carry no guaranteed ACL protection, and warranty claims typically require shipping the unit internationally at your own cost.
Retailer support matters for NAS. Most Australian retailers operate on 3-5% NAS margin, so pricing is remarkably uniform across the major stores. The real difference is what happens when something goes wrong. Buy from a retailer that will work with you through the warranty process rather than chasing a $10 saving at a store with no support capability.
Use our free NAS Sizing Wizard to get a personalised NAS recommendation.
Related reading: our NAS buyer's guide and our NAS explainer.
Can I run Home Assistant on a Synology NAS with an ARM processor?
Technically yes, but it's not recommended. ARM-based Synology models (DS124, DS223, DS423) can run the Home Assistant Container image, but many community integrations, HACS add-ons, and tools like ESPHome require x86_64 architecture. You will hit compatibility issues. The DS225+ ($549 at Scorptec) is the entry point for a trouble-free Home Assistant experience on Synology.
How much RAM does Home Assistant need on a NAS?
Home Assistant Container uses roughly 256-512 MB of RAM in typical operation. However, if you're running additional containers (Zigbee2MQTT, Mosquitto, Node-RED, Plex), total RAM usage climbs quickly. A NAS with 2 GB of RAM can technically run HA alone, but 4 GB is the practical minimum for a comfortable smart home stack, and 8 GB gives you room to grow. The QNAP TS-264 ($819 at PLE) ships with 8 GB, making it a strong choice without requiring a RAM upgrade.
Does Home Assistant work behind NBN CGNAT?
Home Assistant works fine on your local network regardless of CGNAT. The problem is remote access. Controlling your home from outside your network. CGNAT blocks inbound connections, so standard port forwarding does not work. Use Nabu Casa (paid subscription), Tailscale (free VPN), or Cloudflare Tunnel (free, requires a domain) to access Home Assistant remotely on CGNAT connections. Some RSPs like Aussie Broadband and Superloop offer static IP add-ons for $5-$10/month that eliminate CGNAT entirely.
Can I use a Zigbee USB stick with a NAS running Home Assistant?
Yes. Plug a Zigbee coordinator (such as the Sonoff ZBDongle-P or ZBDongle-E, around $40-50 AUD on Amazon AU) into a USB port on the NAS and map the device path into the Home Assistant container. Use /dev/serial/by-id/ paths for reliability rather than /dev/ttyUSB0, which can change on reboot. USB passthrough works on Synology, QNAP, and Asustor, though Synology requires privileged container mode.
Is it better to use Docker or a VM for Home Assistant on a NAS?
Docker (Home Assistant Container) is lighter, faster, and simpler for experienced users. It uses less RAM and starts in seconds. The VM method (Home Assistant OS) gives you the full add-on store and Supervisor for automatic backups and updates, but requires at least 2 GB of dedicated RAM and a NAS that supports virtualisation. For most NAS users, Docker is the better fit because it leaves more resources for other NAS tasks. Choose the VM if you specifically need the add-on store or prefer the guided Home Assistant experience.
How much does it cost to run a NAS with Home Assistant 24/7 in Australia?
A 2-bay NAS like the Synology DS225+ draws 15-20 watts under typical load. At Australian electricity rates of $0.30-$0.40/kWh, that's roughly $40-$70 per year. A 4-bay model draws 25-35 watts, costing $65-$110 per year. This is more than a Raspberry Pi ($13-$25/year) but you get file storage, backups, media serving, and Docker hosting on the same hardware. The incremental cost of running Home Assistant on an existing NAS is essentially zero. It adds minimal load to hardware that's already running.
Which is the cheapest x86 NAS that runs Home Assistant in Australia?
The TerraMaster F2-425 at $459 from Scorptec is currently the cheapest x86 NAS that supports Docker and runs Home Assistant. It has an Intel Celeron N5095 and 4 GB of RAM. However, TerraMaster's software ecosystem is less mature than Synology or QNAP, and community support for Home Assistant on TerraMaster is limited. The next step up is the Synology DS225+ at $549 (Scorptec), which costs $90 more but has far better software, community documentation, and long-term update support.
Ready to consolidate your smart home controller and file server? See which NAS models handle Docker and home automation best in our full comparison guide.
Best NAS for Docker & Home Automation →