Setting up an Asustor NAS takes about 30 to 45 minutes from unboxing to a working file server, and the process is straightforward even for first-time NAS buyers. Asustor's ADM (Asustor Data Master) operating system handles the heavy lifting through a browser-based setup wizard. This guide walks Australian buyers through every step. From installing drives and connecting to your NBN router, through to configuring remote access, Docker containers, media streaming, and the security settings that keep your data safe. Whether you've picked up an AS5404T Nimbustor, a Drivestor 2 Pro, or a Lockerstor, the core setup process is the same across the entire Asustor NAS range.
In short: Install drives, connect Ethernet to your router, power on, open a browser and navigate to find.asustor.com, then follow the ADM setup wizard. The entire process takes 30-45 minutes. The key decision during setup is your RAID level. Choose RAID 1 for a 2-bay unit (mirror protection) or RAID 5 for a 4-bay unit (one-drive fault tolerance with good capacity). Asustor's EZ-Connect handles remote access without port forwarding, which matters for Australian NBN connections that use CGNAT.
What You Need Before You Start
Before powering on your Asustor NAS, make sure you have everything ready. All Asustor NAS units sold in Australia ship diskless. You need to buy hard drives separately. This is standard across every model, from the entry-level Drivestor 2 Gen2 AS1202T ($356 at Mwave, $359 at Scorptec) through to the Lockerstor 4 Gen3 AS6804T ($2,175 at Mwave, $1,799 at Scorptec).
Hardware Checklist
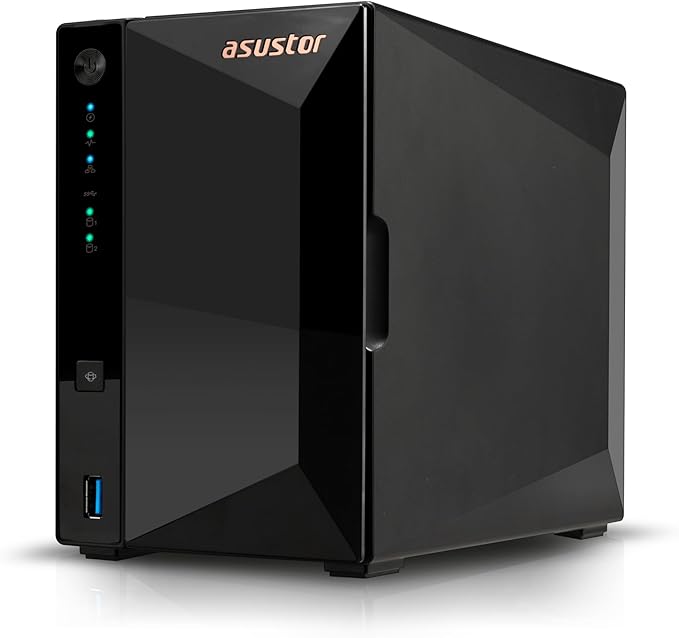
Your Asustor NAS unit. Whichever model suits your needs. For a breakdown of every current model with live AU pricing, see our complete Asustor NAS guide for Australia.
NAS-rated hard drives. At least one drive, though two or more are strongly recommended for redundancy. Use NAS-specific drives like the Seagate IronWolf or WD Red Plus. Standard desktop drives lack the firmware tuning for 24/7 operation and will fail sooner in a NAS enclosure. NAS-grade drive prices have risen significantly from early 2025 levels. Expect to pay above $200 for a 4TB NAS drive in 2026. See our best NAS hard drive guide for current AU pricing and recommendations.
An Ethernet cable. Included in the box. Your NAS must be wired directly to your router or network switch. Wi-Fi is not supported on the NAS itself (your devices can access it wirelessly, but the NAS needs a physical Ethernet connection).
A computer or phone on the same network. You will use a web browser to complete the ADM setup wizard. Any device connected to the same router will work.
A Phillips-head screwdriver. Needed for securing 2.5-inch SSDs in drive trays. Most Asustor models use tool-free click-and-slide trays for 3.5-inch drives, but 2.5-inch installations require screws.
Step 1. Install Your Hard Drives
Asustor's drive installation is designed for quick setup. The exact tray mechanism varies slightly between product lines, but the general process is the same.
1. Remove the drive trays. On Nimbustor models (AS5402T, AS5404T), press the push-button latch and slide the tray out. On Drivestor models, remove the front cover first, then slide out the trays. Lockerstor Gen3 models use a latch-and-lock mechanism with an included key.
2. Seat the drive. For 3.5-inch drives, remove the side-mounting clips from the tray, place the drive with the SATA connector facing the rear, and snap the clips back into place. No screws required. For 2.5-inch SSDs, use the screw holes on the underside of the tray to secure the drive.
3. Slide the tray back in. Push the tray firmly until you hear it click. The drive connects to the internal SATA backplane automatically.
4. Repeat for all drives. Install every drive before powering on. Creating a RAID array with all drives present from the start is far simpler than adding drives later.
Handle drives carefully. Hard drives are precision instruments. Do not drop them, knock them against the case, or touch the exposed PCB on the bottom. Hold drives by the sides only. Static discharge can permanently damage the controller.
Step 2. Connect to Your Network and Power On
Connect the Ethernet cable from the LAN port on the back of the NAS to a spare port on your NBN router or network switch. If your Asustor has multiple LAN ports. The Nimbustor 4 Gen2 AS5404T has dual 2.5GbE ports, and the Lockerstor Gen3 models feature dual 5GbE or even 10GbE. Use the fastest port for your primary connection.
Connect the power cable and press the power button. The NAS will boot up. You will hear the drives spin and see the LEDs begin flashing. First boot takes one to two minutes as the hardware initialises.
Placement matters. Position your NAS somewhere with adequate airflow. Not inside a sealed cupboard or entertainment unit. Hard drives generate heat under sustained operation, and the fans need room to exhaust warm air. A shelf near your router is ideal. The Nimbustor line has a distinctive gamer-aesthetic design that some people prefer to display, while the Drivestor and Lockerstor lines have more traditional looks. All produce a low fan hum, so avoid placing them in a bedroom.
Step 3. Find Your NAS and Install ADM
Once your NAS has booted (the system LED will turn solid green), open a web browser on any device connected to the same network and navigate to:
find.asustor.com
Asustor's Control Center will scan your local network and detect the NAS automatically. If it does not appear, try entering the NAS's IP address directly. Check your router's connected devices list to find it. Alternatively, download the Asustor Control Center desktop utility (available for Windows and macOS) which can discover the NAS even when the browser method fails.
The setup wizard will prompt you to install ADM (Asustor Data Master). This is Asustor's Linux-based operating system. Select Quick Setup for the fastest path, or Custom Setup if you want granular control over the RAID configuration during installation. ADM will download and install automatically. This takes 5-10 minutes depending on your internet speed. The NAS will restart once installation is complete.
Do not disconnect power during ADM installation. Interrupting the install process can corrupt the system partition and force a factory reset. Let it complete fully. The NAS will restart on its own when ready.
Step 4. Create Your Admin Account and Basic Settings
After ADM installs and the NAS restarts, the setup wizard will guide you through initial configuration:
1. Set a device name. This is how the NAS appears on your network. Keep it simple. Something like "AsustorNAS" or "HomeNAS". Avoid spaces and special characters.
2. Create an administrator account. Choose a username that is not "admin" and set a strong password. Asustor allows you to disable the default admin account after creating your own, which you should do immediately for security. Write the credentials down and store them safely.
3. Set your time zone. Select your Australian time zone (AEST/AEDT for eastern states, ACST for SA/NT, AWST for WA). Correct time settings matter for scheduled tasks, log accuracy, and SSL certificate validation.
4. Register an Asustor ID. You will be prompted to create or sign in with an Asustor ID. This is required for EZ-Connect (Asustor's remote access service) and push notifications. Creating one is strongly recommended. Without it, remote access requires manual DDNS and port forwarding configuration.
Step 5. Create a Storage Volume with RAID
This is the most critical step, and the one where first-time NAS users tend to pause. Asustor's Storage Manager makes the process straightforward, but understanding the RAID decision is important because it affects both your data safety and usable capacity. For a deeper explanation, see our NAS RAID explained guide.
If the setup wizard did not configure storage during installation (or you chose Quick Setup), open Storage Manager from the ADM desktop. Click Volume and then Create.
Choosing Your RAID Level
Asustor uses standard RAID levels rather than a proprietary hybrid system. Here is what matters for home and small business users:
RAID 1 (Mirror). The standard choice for 2-bay NAS units like the Drivestor 2 Pro AS3302T V2 ($439 at Mwave and Scorptec, $389 at PLE) or the Nimbustor 2 Gen2 AS5402T ($789 at Mwave, $639 at Scorptec). Two drives, identical copies of data on each. One drive can fail without data loss. Usable capacity equals one drive's size.
RAID 5. The standard choice for 4-bay (or larger) NAS units. Requires a minimum of three drives. One drive's worth of capacity is used for parity data, so with four 4TB drives you get approximately 12TB usable. One drive can fail without data loss. This is the best balance of protection and capacity for the AS5404T ($879 at Mwave, $799 at Scorptec) or the Drivestor 4 Pro AS3304T V2 (~$762 at Mwave,~$762 at Scorptec,~$762 at PLE).
RAID 6 or RAID 10. Two-drive fault tolerance options for larger arrays. RAID 6 needs a minimum of four drives and sacrifices two drives' worth of capacity to parity. RAID 10 stripes mirrored pairs. Both are suited to business-critical deployments rather than home use.
Single / JBOD. No redundancy. If a drive fails, you lose everything on it. Only use this if you have a comprehensive external backup strategy and want maximum raw capacity. Not suitable for most users.
For most Australian home users: Choose RAID 1 on a 2-bay NAS or RAID 5 on a 4-bay NAS, with the EXT4 file system. Asustor also supports Btrfs on Intel-based models (Nimbustor, Lockerstor, Flashstor), which adds snapshot and data checksumming capabilities. If your model supports Btrfs, use it. The snapshot feature alone is worth it for ransomware recovery.
After selecting your RAID level, choose the drives to include, select your file system, and click through to create the volume. Initialisation and RAID synchronisation will run in the background. This can take several hours depending on drive size, but you can use the NAS immediately while it completes.
Step 6. Create Shared Folders and User Accounts
Shared folders are the top-level directories visible when you access the NAS from other devices. Go to Access Control > Shared Folders > Add in the ADM interface.
A practical starting structure for most households:
- Documents. Important files, scanned paperwork, tax records
- Photos. Family photos and videos
- Media. Movies, music, and TV shows for streaming via Plex or LooksGood
- Backups. Time Machine (Mac) or PC backup destinations
User accounts: For a single-user setup, the admin account you already created is sufficient. For a household with multiple people or a small office, go to Access Control > Local Users > Add and create individual accounts. Assign folder-level read/write or read-only permissions to each user. This prevents accidental deletion and keeps personal files private on a shared NAS.
Step 7. Set Up Remote Access with EZ-Connect
Accessing your NAS from outside your home network is one of the most valuable features, but Australian internet connections create specific challenges. Asustor's EZ-Connect is the simplest way to get remote access working.
EZ-Connect (Easiest Option)
EZ-Connect is Asustor's relay-based remote access service. It routes your connection through Asustor's servers, which means it bypasses CGNAT and other network restrictions that block direct connections. Enable it in Settings > EZ-Connect. Choose an EZ-Connect ID. This becomes your personal URL: ezconnect.to/YourID.
Pros: Works immediately, no router configuration needed, bypasses CGNAT, works from Asustor mobile apps (AiMaster, AiData).
Cons: Slower than a direct connection because traffic is relayed. Performance is limited by your NBN connection's upload speed. On a typical NBN 100 plan, that is around 20Mbps upload (roughly 2.5MB/s real-world). For large file transfers or high-quality media streaming over the internet, this can be a bottleneck.
DDNS with Port Forwarding (Faster, More Technical)
For faster remote access, configure DDNS with port forwarding to create a direct connection. Go to Settings > Manual Connect > EZ-Router. Asustor's EZ-Router can automatically configure UPnP-compatible routers to forward the correct ports. If your router does not support UPnP, you will need to manually forward ports 8000 (HTTP) and 8001 (HTTPS) to your NAS's local IP address.
For a custom domain, configure DDNS under Settings > Manual Connect > DDNS. Asustor supports several free DDNS providers including myasustor.com. Set up a Let's Encrypt SSL certificate under Settings > Certificate Manager for encrypted HTTPS connections.
CGNAT warning for Australian NBN users: Many NBN connections. Particularly fixed wireless, satellite, and some fibre-to-the-node plans. Use CGNAT (Carrier-Grade NAT). CGNAT means your router does not have a public IP address, which makes port forwarding impossible. If port forwarding fails, contact your ISP and ask whether you are behind CGNAT. Some ISPs (like Aussie Broadband) will assign a static public IPv4 address on request for a small monthly fee. If CGNAT is unavoidable, use EZ-Connect or set up a WireGuard/Tailscale VPN tunnel as alternatives.
Step 8. Install Docker and Portainer for Containers
One of Asustor's strengths is straightforward Docker support across its Intel and AMD-powered models. Docker lets you run containerised applications. From Plex and Jellyfin to Home Assistant, Pi-hole, and Nextcloud. Without affecting the core ADM system. If your Asustor has an Intel Celeron (Nimbustor, Lockerstor Gen2, Flashstor) or AMD Ryzen (Lockerstor Gen3) processor, Docker is fully supported.
Note: The Drivestor line uses Realtek RTD1619B ARM processors. Docker is available on these models but with limited container compatibility. Many popular containers are built for x86/amd64 only. If Docker is a priority, choose a Nimbustor or Lockerstor model.
Installing Docker and Portainer
1. Install Docker CE. Open App Central (Asustor's package manager) and search for "Docker CE" or "Docker Engine". Install it. This takes a minute or two.
2. Install Portainer. Portainer is a web-based Docker management GUI that makes container deployment far more accessible than the command line. Search for "Portainer" in App Central and install it, or deploy it as a Docker container itself. Once running, access it at http://your-nas-ip:9000.
3. Deploy containers. From Portainer's dashboard, you can search Docker Hub for images, configure container settings (volumes, ports, environment variables), and manage running containers with a visual interface. For your first container, Plex or Jellyfin are excellent starting points.
Step 9. Set Up Plex and Media Streaming
Asustor has long positioned itself as a media-friendly NAS brand, and their hardware reflects it. The Nimbustor and Lockerstor lines include HDMI output for direct display connection, and the Intel/AMD processors support hardware transcoding for Plex and other media servers.
Plex Media Server
Install Plex directly from App Central. Search for "Plex Media Server" and install. After installation, access the Plex web interface at http://your-nas-ip:32400/web. Sign in with your Plex account, point it at your Media shared folder, and let it scan and index your library.
Hardware transcoding: The Intel Celeron N5105 in the AS5402T and AS5404T handles 4K to 1080p transcoding comfortably for one or two simultaneous streams. The AMD Ryzen V3C14 in the Lockerstor Gen3 models handles multiple concurrent transcodes with ease. A Plex Pass subscription is required to enable hardware transcoding on NAS devices. The Drivestor's Realtek ARM processor does not support hardware transcoding. It can only direct-play media, which requires your playback device to natively support the media format.
Asustor LooksGood and Other Media Apps
Asustor's own LooksGood app (available in App Central) provides media cataloguing and streaming without needing a third-party service. It supports DLNA and the AiVideos mobile app for remote playback. For users who want a completely self-contained media solution without Plex accounts or subscriptions, LooksGood is a viable option. Jellyfin (deployed via Docker) is another free, open-source alternative that avoids Plex's subscription model entirely.
Step 10. Configure Backup Tools
RAID protects you from a drive failure, but RAID is not backup. A fire, theft, ransomware attack, or accidental deletion can still destroy data on a RAID array. Setting up proper backups on day one is essential.
Asustor Backup Plan (Built-In)
Asustor's Backup Plan app (install from App Central if not pre-installed) handles local and remote backups. It supports backup to external USB drives, remote NAS units, and cloud destinations including Amazon S3, Backblaze B2, and Microsoft Azure. Set up a scheduled backup to an external USB drive as your first line of defence. Daily or weekly, depending on how frequently your data changes.
Snapshot Center (Btrfs Models Only)
If your Asustor model supports Btrfs (Intel and AMD models. Nimbustor, Lockerstor, Flashstor), install Snapshot Center from App Central. Set up scheduled snapshots for each shared folder. Daily snapshots with a 30-day retention is a sensible starting point. Snapshots let you roll back files to a previous version if they are accidentally deleted, corrupted, or encrypted by ransomware. This is a critical layer in your ransomware protection strategy.
Time Machine and PC Backups
Mac users: Enable Time Machine support on your Asustor NAS via Services > Apple Filing. Enable AFP and Time Machine support, then select which shared folder to use as the Time Machine destination. Your Mac will automatically discover the NAS as a backup target.
Windows users: Use the built-in Windows Backup or third-party tools like Veeam Agent (free) to back up to a network share on your NAS. Map the Backups shared folder as a network drive and point your backup software at it.
Step 11. Secure Your NAS with ADM Defender
Security is not optional, especially if you have enabled any form of remote access. Asustor's ADM Defender is the built-in security suite, and configuring it properly on day one will protect your NAS from the majority of automated attacks.
1. Enable auto-block. Go to Settings > ADM Defender > Auto Black List. Enable it and set the threshold to 5 failed login attempts within 5 minutes. This blocks brute-force attacks that try common username and password combinations against your login page.
2. Enable the firewall. Under ADM Defender > Firewall, enable the firewall and set a default deny rule for all traffic, then add allow rules for the specific services and IP ranges you use. At a minimum, allow traffic from your local network (e.g., 192.168.1.0/24) and block everything else.
3. Enable two-factor authentication (2FA). Go to Settings > 2-Step Verification and enable it for your admin account. Use an authenticator app like Google Authenticator or Microsoft Authenticator. A NAS exposed to the internet without 2FA is an open invitation for attackers.
4. Disable unused services. Under Services, disable any protocols you are not using. SSH, FTP, Telnet, and SFTP should all be disabled unless you specifically need them. Every open service is a potential attack surface.
5. Set up email or push notifications. Go to Settings > Notifications and configure email alerts or ADM push notifications. This ensures you are alerted immediately if a drive fails, a login attempt is blocked, or the system needs attention. A failed drive that goes unnoticed can turn a recoverable RAID situation into permanent data loss when a second drive fails.
Asustor and ransomware history: In February 2022, Asustor NAS devices were targeted by the Deadbolt ransomware. Asustor responded with improved default security settings and faster firmware patches, but the incident is a reminder that NAS security requires active configuration. Enable ADM Defender, keep ADM updated, use strong passwords with 2FA, and maintain offline backups. No NAS vendor is immune to zero-day exploits. Your backup strategy is your last line of defence.
Step 12. Keep ADM and Apps Updated
Firmware and application updates are critical for both security patches and new features. Asustor releases ADM updates regularly, and staying current is non-negotiable if your NAS is internet-accessible.
ADM updates: Go to Settings > ADM Update. Enable automatic update checks and notifications. When an update is available, review the release notes before installing. Major version updates (e.g., ADM 4.x to 5.x) occasionally change features or require app updates. Schedule updates during off-peak hours when the NAS is not being actively used, as the system will restart during the update process.
App updates: Open App Central and check the "Updates" tab periodically. Keep Plex, Docker, and all installed apps current. Outdated apps with known vulnerabilities are a common entry point for attacks.
Before any major firmware update, take a configuration backup via Settings > Backup & Restore. This saves your ADM settings, user accounts, shared folder configurations, and app settings. If an update goes wrong, you can restore your configuration to a new ADM installation without reconfiguring everything manually.
Which Asustor NAS Should You Buy?
If you have not purchased your NAS yet, here is a quick overview of the most popular Asustor models for Australian buyers. Asustor is distributed exclusively through Dicker Data in Australia, which means stock availability can be more variable than Synology or QNAP. All major Australian retailers source from the same distributor, so pricing is fairly uniform. For a full comparison, see our complete Asustor NAS ranking.
Popular Asustor Models for Australian Buyers
 Drivestor 2 Pro V2 (AS3302T V2)
|
 Nimbustor 4 Gen2 (AS5404T)
|
 Lockerstor 4 Gen2 (AS6804T)
|
Lockerstor 4 Gen3 (AS6804T)
|
|
|---|---|---|---|---|
| Bays | 2 | 4 | 4 | 4 |
| CPU | Realtek RTD1619B (ARM) | Intel Celeron N5105 | Intel Celeron N5105 | AMD Ryzen V3C14 |
| RAM | 2GB | 4GB | 4GB | 16GB |
| Network | 1x 2.5GbE | 2x 2.5GbE | 2x 2.5GbE | 2x 5GbE |
| Docker / Plex Transcoding | Limited / No | Yes / Yes | Yes / Yes | Yes / Yes |
| AU Price (From) | $439 (Mwave) | $879 (Mwave) | $2,175 (Mwave) | $2,175 (Mwave) |
| Best For | Budget file storage, backups | Home media, Plex, Docker | Power users, dual 2.5GbE | Heavy workloads, SMB |
Prices last verified: 1 March 2026. Always check retailer before purchasing.
The Nimbustor 4 Gen2 AS5404T at $799 from Scorptec ($879 at Mwave, $799-$849 at PLE) is the sweet spot for most Australian households wanting a media-capable NAS with Docker support. The Drivestor 2 Pro V2 at $389 from PLE ($439 at Mwave and Scorptec) suits buyers who want affordable 2.5GbE network storage without the advanced features. The Lockerstor Gen3 line targets power users and small businesses who need AMD Ryzen performance and faster networking.
Australian Consumer Law note: When purchasing from Australian retailers like Scorptec, PLE, or Mwave, you are covered by ACL protections including the right to a repair, replacement, or refund for products with a major fault. This protection does not apply to grey imports or international purchases. For a device that stores your data, buying locally from an authorised retailer is worth the peace of mind. Asustor is distributed in Australia exclusively through Dicker Data, so any authorised AU retailer is sourcing from the same supply chain.
Accessing Your NAS from Computers and Phones
From a Windows PC
Open File Explorer, type \\YourNASName or \\192.168.x.x in the address bar, and press Enter. Enter your NAS credentials when prompted. To make this permanent, right-click a shared folder and select Map network drive. Assign a drive letter and tick "Reconnect at sign-in."
From a Mac
Open Finder and look for your NAS under Locations in the sidebar. If it does not appear, press Cmd+K and type smb://YourNASName to connect manually. Enter your credentials and the shared folders will mount as network drives.
From a Phone or Tablet
Download Asustor's mobile apps from iOS App Store or Google Play: AiMaster for NAS management and monitoring, AiData for file browsing and transfers, and AiVideos for media streaming. All apps support EZ-Connect for remote access and local IP when on the same network.
Troubleshooting Common Setup Issues
find.asustor.com Cannot Find My NAS
Verify the Ethernet cable is firmly connected at both the NAS and router ends. Check that the NAS has powered on (system LED should be solid green). Try the Asustor Control Center desktop utility, which uses network broadcast discovery and is more reliable than the browser method. If using a mesh Wi-Fi system, ensure your computer and NAS are on the same network segment. Some mesh systems isolate wired and wireless clients by default.
RAID Initialisation Seems Stuck
RAID synchronisation after volume creation is a background process that can take many hours. For large drives (8TB+), expect 12-24 hours for a full RAID 5 initialisation. The NAS is fully usable during this time, but write performance will be reduced. Do not power off the NAS or remove drives during synchronisation. Check progress in Storage Manager > Volume.
EZ-Connect Remote Access Not Working
Ensure you have registered an Asustor ID and that EZ-Connect is enabled in Settings > EZ-Connect. Check that the NAS has internet access. Go to Settings > Network and verify the DNS and gateway settings. If EZ-Connect works but DDNS/port forwarding does not, you are likely behind CGNAT. Contact your ISP to request a public IPv4 address, or stick with EZ-Connect as your remote access method.
Next Steps After Setup
Your Asustor NAS is now running, accessible, and secured. Here is what to focus on in the days after setup:
- Start moving data. Copy your most important files first. Documents, photos, and anything that currently exists on only one device.
- Set up Backup Plan to an external USB drive or cloud destination. RAID protects against drive failure but not against fire, theft, or ransomware.
- Install Plex or LooksGood and configure your media library if you plan to stream content.
- Deploy Docker containers for additional services like Pi-hole (ad blocking), Home Assistant (smart home), or Nextcloud (file sync).
- Run a S.M.A.R.T. test on your drives via Storage Manager. This checks drive health and establishes a baseline for ongoing monitoring.
- Bookmark the ADM login page. http://your-nas-ip:8000 for local access.
Asustor does not have an office or phone support line in Australia. Technical support is handled through Asustor's online ticket system and community forums. If you are buying your first NAS, purchasing from a specialist like Scorptec or PLE where you can get genuine pre-sales guidance is worth the peace of mind. Not from Amazon where the price might be better but the support is nonexistent. Most Australian retailers operate on 3-5% NAS margin, so pricing is remarkably uniform. The real difference between retailers is what happens when something goes wrong.
Don't skip power protection: our UPS Sizing Calculator recommends the right UPS VA rating for your Asustor and drive configuration.
Related reading: our NAS buyer's guide and our NAS explainer.
Related reading: our Synology vs QNAP comparison.
Use our free NAS Sizing Wizard to get a personalised NAS recommendation.
How long does it take to set up an Asustor NAS from scratch?
About 30 to 45 minutes from unboxing to a working file server. Installing drives takes 5 minutes, ADM installation takes 5-10 minutes, and the setup wizard takes another 10-15 minutes. RAID synchronisation runs in the background for several hours but does not prevent you from using the NAS immediately.
Can I run Docker on an Asustor Drivestor?
Docker is technically available on Drivestor models (AS1202T, AS1204T, AS3302T V2, AS3304T V2), but the Realtek RTD1619B ARM processor limits compatibility. Many popular Docker containers are built for x86/amd64 architectures only and will not run on ARM. If Docker is a key use case, choose a Nimbustor (Intel Celeron) or Lockerstor (Intel/AMD) model instead. The AS5404T Nimbustor 4 Gen2 at $799 from Scorptec is the entry point for full Docker and Plex transcoding support.
Does Asustor support Btrfs file system?
Yes, but only on Intel and AMD-powered models. The Nimbustor (AS5402T, AS5404T), Lockerstor, and Flashstor lines all support Btrfs, which provides data checksumming, scheduled snapshots, and self-healing capabilities. The Drivestor line (Realtek ARM processors) supports EXT4 only. If snapshot-based ransomware protection matters to you, choose a model with Btrfs support.
Will EZ-Connect remote access work on my NBN connection?
Yes. EZ-Connect works on all NBN connection types, including those behind CGNAT. It routes traffic through Asustor's relay servers, bypassing the network restrictions that block direct connections. Performance is limited by your NBN upload speed. On a typical NBN 100 plan, expect around 20Mbps upload (about 2.5MB/s). For faster remote access, you need a public IPv4 address from your ISP and manual DDNS/port forwarding configuration. NBN 100/40 plans offer better upload speeds of around 40Mbps.
Is Asustor as reliable as Synology or QNAP?
Asustor hardware is well-built, and ADM is a capable operating system. The main difference is ecosystem maturity. Synology's DSM has a larger app library and more polished first-party applications, while QNAP has deeper virtualisation features. Asustor's advantage is competitive pricing, native HDMI output for media use, and a more open approach to third-party software. The February 2022 Deadbolt ransomware incident raised security concerns, but Asustor has since improved default security settings and patching speed. Regardless of brand, NAS security depends on the user configuring firewalls, 2FA, and proper backup practices.
Where is the cheapest place to buy an Asustor NAS in Australia?
Pricing is remarkably uniform across Australian retailers because most operate on 3-5% NAS margin. PLE, Scorptec, and Mwave typically list within $10-30 of each other. PLE occasionally edges lower on popular models. The real difference between retailers is stock availability and after-sales support, not price. Asustor is distributed exclusively through Dicker Data in Australia, which means all authorised retailers source from the same channel. For a device that stores your data, the retailer relationship matters more than saving a few dollars.
Can I use my Asustor NAS as a Plex server?
Yes, if your model has an Intel or AMD processor. The AS5404T (Intel Celeron N5105) handles 4K to 1080p transcoding for one to two simultaneous streams. The Lockerstor Gen3 models with AMD Ryzen V3C14 handle multiple concurrent transcodes comfortably. Install Plex from App Central or deploy it as a Docker container. A Plex Pass subscription is required for hardware transcoding on NAS devices. The Drivestor line cannot transcode. It can only direct-play content, which requires your playback device to support the media format natively.
Looking for the right Asustor model? Our complete ranking covers every current model with live AU pricing and use-case recommendations.
See All Asustor NAS Models Ranked →